Top 6 Ways to Fix Windows Defender is Turned off by Group Policy
Top 6 Methods to Fix Windows Defender is Turned off by Group Policy
One day you wake up and try to launch Windows Defender only to find that it throws a message that reads Windows Defender is turned off by Group Policy. You might wonder what the group policy is if you don't already know what it is and why it is preventing the Defender from launching on your computer.
Well, there are multiple reasons as to why that happens. Maybe you have installed a new antivirus software and it has disabled the Defender thinking it is of no use anymore. Regardless of the reasoning, the following guide shows how to turn on Windows Defender on your Windows PC.
- Method 1. Check If Windows Defender Service is Running
- Method 2. Turn on Windows Defender from Settings
- Method 3. Turn on Windows Defender Using Command Line
- Method 4. Disable "Turn off Windows Defender Antivirus" in Group Policy
- Method 5. Delete DisableAntiSpyware Value in Registry Editor
- Method 6. Run SFC Scan
Method 1. Check If Windows Defender Service is Running
Windows uses and runs several services on your computer and when any of these services stops working, problems start to occur. If the Windows Defender service has stopped for some reason, you may want to check and start it again. The following shows how to do it on your PC:
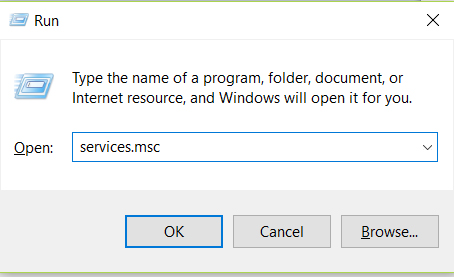
Step 1: Press the Windows + R key on your keyboard to open the Run dialog box. Type in services.msc into the box and hit Enter.
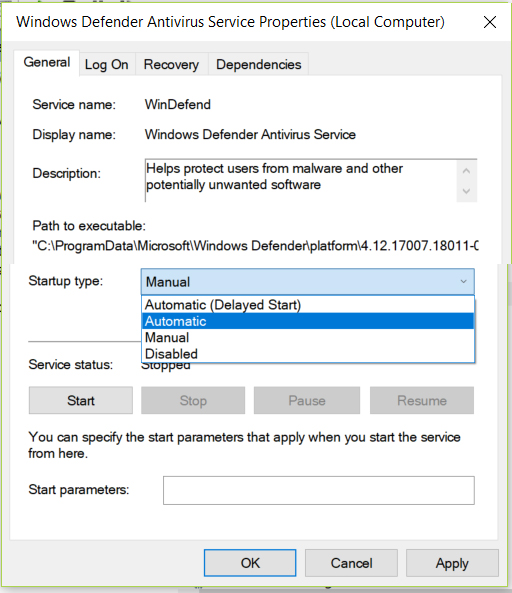
Step 2: When the services panel launches, find the service named Windows Defender Antivirus Service and right-click on it and select Properties.

Step 3: In the Properties box, select Automatic from the Startup type dropdown menu, click on the Start button, and then click on OK.
The service should be enabled by now, and you should be able to open Windows Defender on your PC.
Method 2. Turn on Windows Defender from Settings
If Windows Defender won't turn on even after the above method, you may want to try opening it from the Settings panel on your Windows computer. The following shows how you can go about doing it.
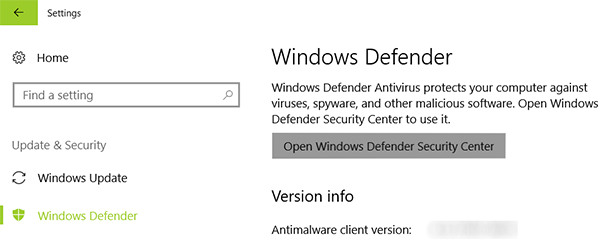
Step 1: Press the Windows + I key combo on your keyboard and it will open the Settings panel. When it opens, click on Update & Security and then select Windows Defender followed by Open Windows Defender Security Center.
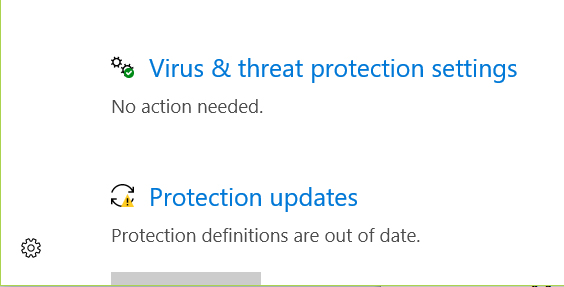
Step 2: Click on Virus & threat protection on the screen that follows.
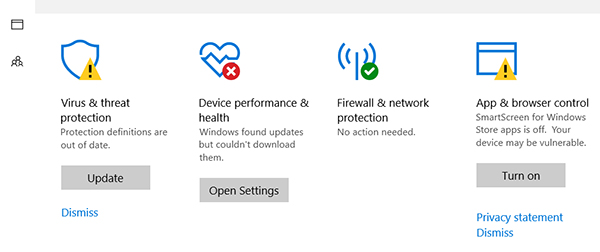
Step 3: Click on Virus & threat protection settings option to open the settings menu.
Step 4: Find the option named Real-time protection and turn it on.
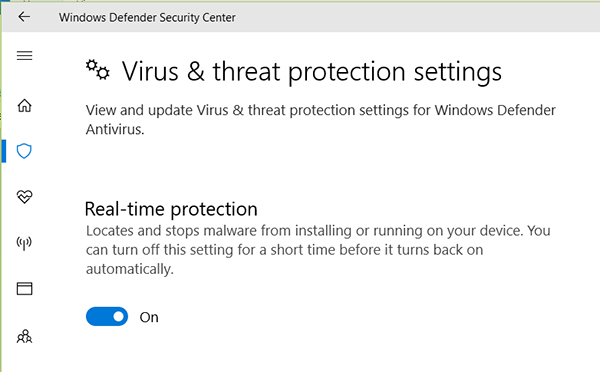
There you go. Windows Defender should now be enabled and running on your computer.
Method 3. Turn on Windows Defender Using Command Line
Command Prompt lets you accomplish several tasks on your Windows computer and one of them is letting you turn on the Windows Defender app on your computer. If you have not done it before, the following shows how.
Powershell has taken over command prompt window in Windows 10 and so you will be using it to accomplish the task.
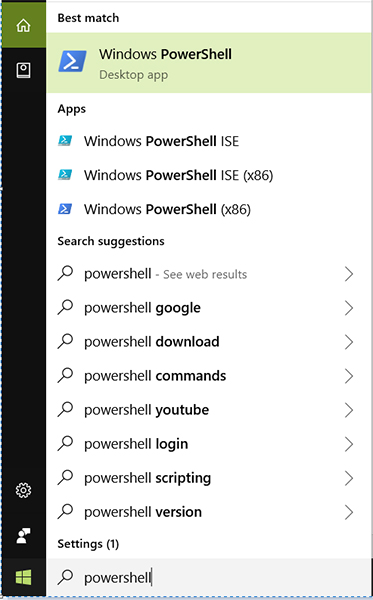
Step 1: Using the start menu search function, search for powershell and right-click on Windows PowerShell when it appears and select Run as administrator.
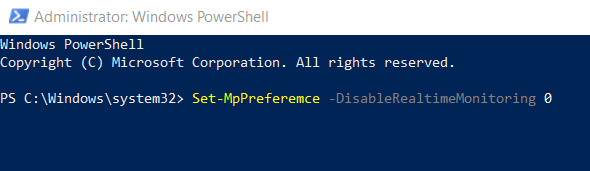
Step 2: When PowerShell launches, type in the following command and hit Enter.
Set-MpPreference -DisableRealtimeMonitoring 0
After the command has executed, restart your PC and you will find that you can now access the Windows Defender app on your computer. So that was how to enable Windows Defender using command line in Windows.
Method 4. Disable "Turn off Windows Defender Antivirus" in Group Policy
If you see a message Windows Defender blocked by Group Policy when you try to launch the app, then this solution will probably help you out. It goes into the Group Policy Editor and modifies a value which in turn allows you to launch the Defender on your PC.
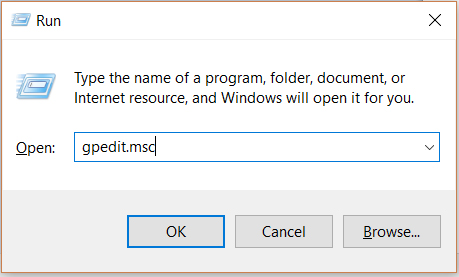
Step 1: Press the Windows + R key to open Run and type in gpedit.msc and hit Enter.
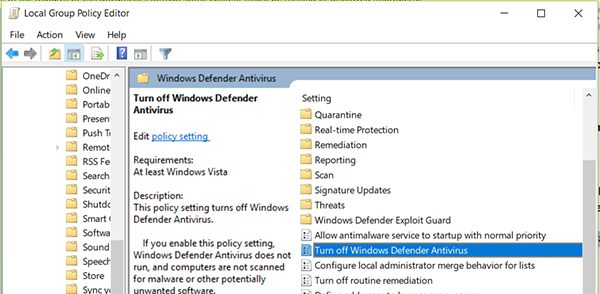
Step 2: When the Group Policy Editor opens, head to the following path. Then, double-click on Turn off Windows Defender Antivirus in the right panel.
Local Computer Policy > Administrative Templates > Windows Components > Windows Defender Antivirus
Step 3: On the following screen, choose the Disabled radio button and click on OK at the bottom.
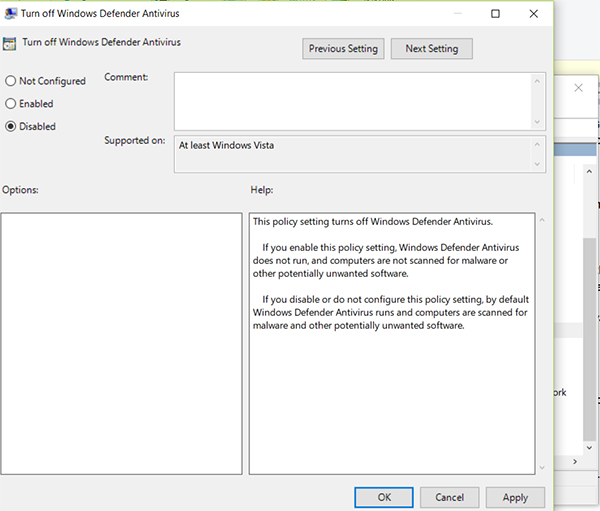
Restart your PC and you should be able to access Windows Defender without any issues.<
Method 5. Delete DisableAntiSpyware Value in Registry Editor
If you would prefer using Registry Editor to do the task, then you can do it as shown below. Basically, what it will do is it will change a value in the registry that is related to Windows Defender and the app will start working again on your computer.
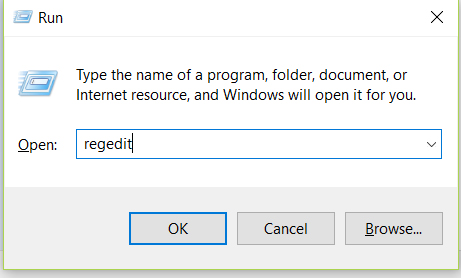
Step 1: Press the Windows + R key to open Run and type in regedit and hit Enter.
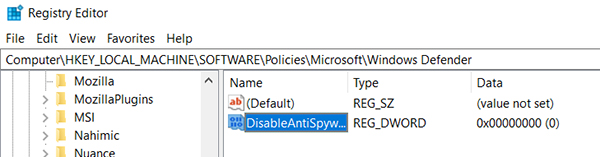
Step 2: When the Registry Editor opens, head to the following path and right-click on the entry named DisableAntiSpyware and select Modify.
HKEY_LOCAL_MACHINE\Software\Policies\Microsoft\Windows Defender
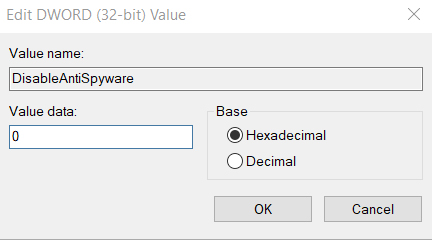
Step 3: Enter 0 as the value of the entry and click on OK.
The file that has just been saved is the DxDiag report for your Windows 10 PC. You may use it to troubleshoot issues or to find out more information about DirectX on your system.
Method 6. Run SFC Scan
If you believe the issue has been caused by the corrupted system files, then you should consider using SFC scan to scan the system files and fix any corrupted files on your PC. The following is how you do it.
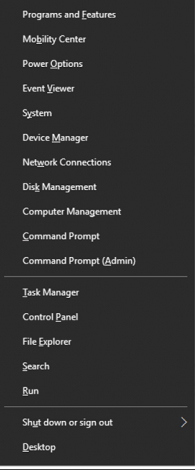
Step 1: Press the Windows + X key and choose Command Prompt (Admin) from the menu that opens up.
Step 2: When the command prompt window opens, type in the following command and hit Enter.
sfc/ scannow
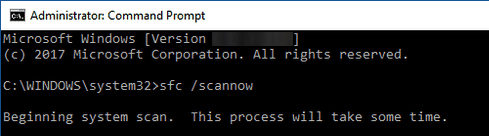
The command will scan and fix any corrupted files on your computer. It will result in you being successful at launching Windows Defender on your machine.
There are so many things that you need to be careful while using a Windows PC. One of these things is that you must remember your user account password each time you want to log-in to your computer. If you ever forget it, you won't be able to access your account. However, with the availability of new software in the market, it is now possible to recover lost Windows passwords. What makes that possible is a software called Windows Password Key. It allows users to reset passwords for your Windows user accounts.
If you ever get into a situation where you can't launch Windows Defender, the above guide will teach you how to enable Windows Defender without any issues on your Windows PC. Also, the 4WinKey software will help you out with your Windows user account password related issues.
- Reset/Remove Windows admin and other user password for local/domain account.
- Create a new local/domain admin account to unlock your computer.
- Change your Microsoft account password offline.
- Fully support Windows 10/8.1/8/7/Vista/XP, Windows Server 2012 (R2)/2008 (R2)/2003 (R2).
- Related Articles
- Top 4 Options to Recover Windows 10 Password on Asus ZenBook Laptops
- Windows 10 Download without Permission, How to Stop?
- How to Change Local Account to Microsoft Account of Windows 10 in 2017
