How to Add, Change, Remove and Restore Desktop Icons on Windows 10
How to Add, Change, Remove and Restore Desktop Icons on Windows 10
There are many useful as well as interesting things available in Windows to make increase the ease of use. One of them is Windows 10 desktop icons. Despite being a popular item, people often create confusion about how to change desktop icon size or how to change icons on Windows 10
Part 1: How to Add Desktop Icons on Windows 10?
Part 2: How to Change Desktop Icons on Windows 10?
Part 3: How to Remove Desktop Icons on Windows 10?
Part 4: How to Restore Desktop Icons in Windows 10?
Extra Tip: Cannot Change Desktop Icons in Windows 10, How to Fix?
Part 1: How to Add Desktop Icons on Windows 10?
Sometimes desktop icons stay hidden. In order to reveal them, make a right click on the desktop and click on "Show desktop icons" under the option "View." Now, let us move the steps for adding desktop icons in Windows .
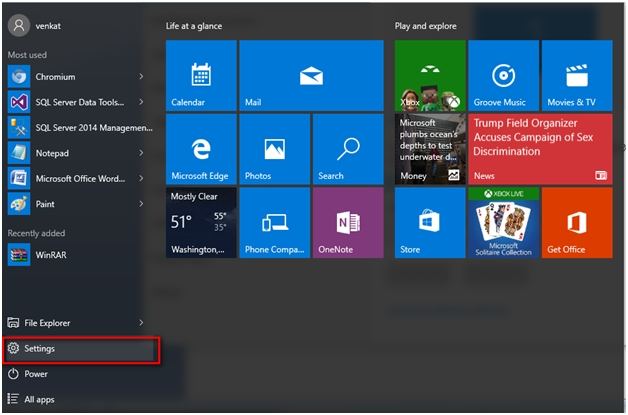
1. Go to "Settings" option and click on it.
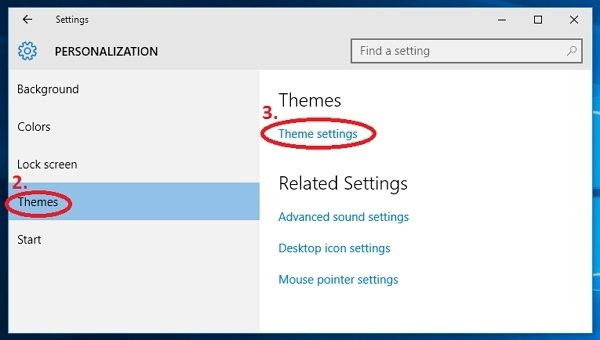
2. Choose "Themes" under "Personalization"
3. There locate "Desktop icon settings" and click on it.
![]()
4. In the popped up window tick the boxes beside the icons which are required to be shown on the desktop.
5. Then click on" Apply"
6. Click on "OK" to save the changes.
Part 2: How to Change Desktop Icons on Windows 10?
Now let's move on how to change desktop icons on Windows 10. Follow these steps to change desktop icon size Windows 10
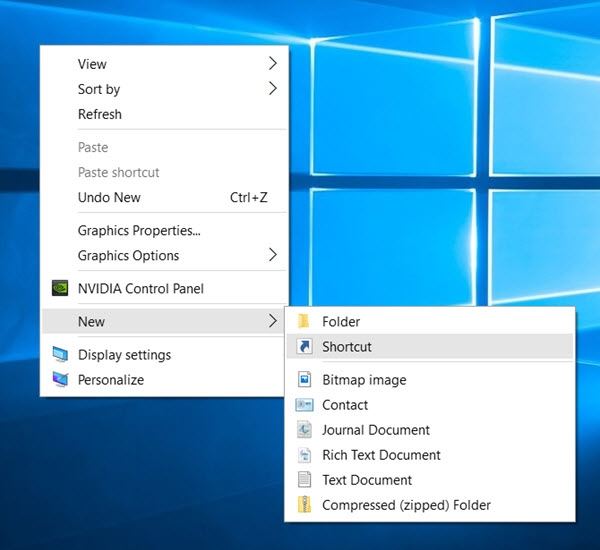
1. Make a right click on the desktop.
2. Select "Personalize" from the drop-down menu.
![]()
3. In the popped up window click on "Themes" to observe every available option for themes. The entire installed one can be found here as well as the opportunity to delete them.
4. Locate "Desktop icon settings" under the "Related settings" and click on it to launch the "Desktop Icon Setting dialog."
![]()
5. Now, click on the desktop icon to choose it. Click on the "Browse" after "Change" button for selecting the required icon as desktop icon.
![]()
6. Browse through the .ico files and choose the desired one. If the user wants to use an image on then, the file should be converted into .icon format first.
![]()
7. After selecting the .ico file click on "Open" button.
![]()
8. Now click on "OK" and then "Apply" to save the changes.
Part 3: How to Remove Desktop Icons on Windows 10?
Removing an unused or annoying desktop icon is also sometimes troublesome if the correct procedure is unknown. Just follow any of the two below mentioned ways to remove a icon from the Windows 10 desktop:
1. Make a right click on the desktop.
2. Put the arrow on "View" option from the drop-down menu.
3. In the popped up context menu click on "Show desktop icons" for deselecting it.
![]()
Part 4: How to Restore Desktop Icons in Windows 10?
Sometimes useful icons may get deleted in due course of action. To restore the same, there are available ways too. Opt for the following steps mentioned to restore the removed icons from the desktop:
1. Launch "Settings"
2. Locate the "Personalize" option and click on the same.
3. Select "Themes" and then click on "Desktop icons settings" link.
![]()
4. In the window select all the icons which are to be restored on the desktop.
![]()
5. Click on "Restore Default"
![]()
6. Now click on "Apply."
7. Click on "OK" to confirm the changes.
Extra Tip: Cannot Change Desktop Icons in Windows 10, How to Fix?
Sometime the user may face issues to customize the desktop icons to his or her needs due to faults in the PC. Follow these steps to fix this
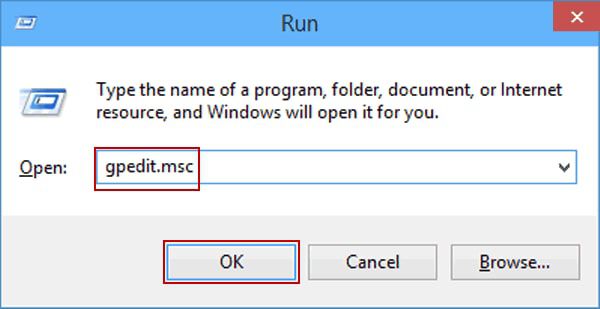
1. First, open the group policy manager, then press the Windows key with R forms the keyboard, a pop up will appear on the screen, and now put the "gpedit.msc" command; now, the group policy manager will be launched. Another way of achieving the launch is to directly launch it from the start menu by typing "group policy."
2. Go to "User Configuration"
3. Locate "Administrative Templates"

4. Under "Administrative Templates" find out "Personalization" within "Control Panel."
5. Click on "Prevent changing desktop icons."
![]()
6. Tap on "Not Configured" box in the popped up window.
7. Then click on "OK."
Other than for switching accounts on a multi-account PC, there are other problems like forgetting the password of your Windows PC, but with the use of a simple tool named 4WinKey, you can easily deal with problems related to a lost password of WINDOWS 10 PC.
- Reset/Remove Windows admin and other user password for local/domain account.
- Create a new local/domain admin account to unlock your computer.
- Change your Microsoft account password offline.
- Fully support Windows 10/8.1/8/7/Vista/XP, Windows Server 2012 (R2)/2008 (R2)/2003 (R2).
- Related Articles
- How to Disable Windows 10 Fast Startup
- Windows 10 Keeps Asking for Login User Password, How to Fix It
- Windows 10 Password is Incorrect, How to Fix it
