How to Add User to Local Administrator Group in Windows Server and Windows 10/8/7
How to Add User to Local Administrator Group in Windows Server and Windows 10/8/7
Sometimes a PC is shared by number of people greater than one. In some cases all of the users need to have full access of the PC. In such cases guest accounts does not work well. The best solution for this is to add user to local administrator group on the PC. There are few ways discussed in this piece of writing for resolving the issues of how to add user as administrator to the PC.
Part 1. Add a (Domain) User to Local Administrator Group in Windows Computer Management
Part 2. Add a User to Local Administrator Group using Command Prompt
Part 3. How to Remove a User from Local Administrator Group
Additional Tip: How to Add a User to Remote Desktop User Group/ Debugger User Group/Power User Group
Part 1. Add a (Domain) User to Local Administrator Group in Windows Computer Management
This method explains the steps to add domain user to local admin group. Follow the directions as mentioned below.
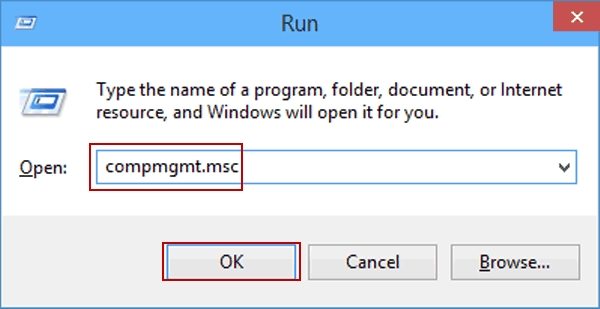
1. Press "R" from the keyboard along with Windows button to launch "Run". In the text field type in "compmgmt.msc" and click on "OK" to launch "Computer Management"
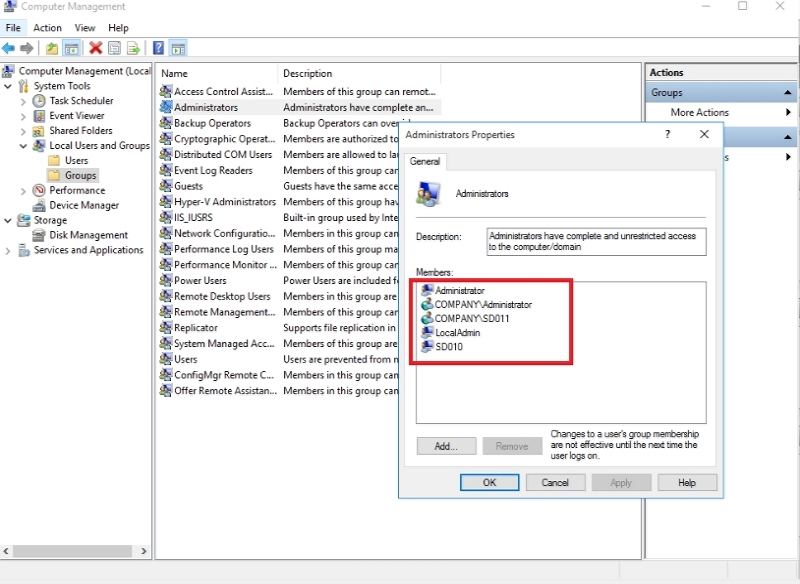
2. After launching "Computer Management" go to "System Tools" on the left side of the panel. Under it locate "Local Users and Groups" folder. Within it, click on "Groups" folder.
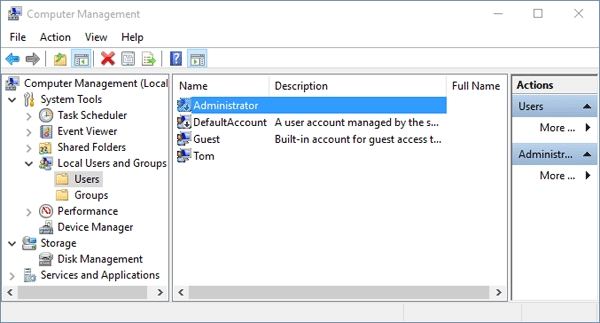
3. In the main menu a number of groups will appear, select the desired group to add the member which in this case is "Administrators".
4. Make a right click one the group named "Administrators" and click on "Add to Group" from the drop down menu.
5. A pop up will appear asking for confirmation of the action, click on "Add" from the options and then click on "OK".
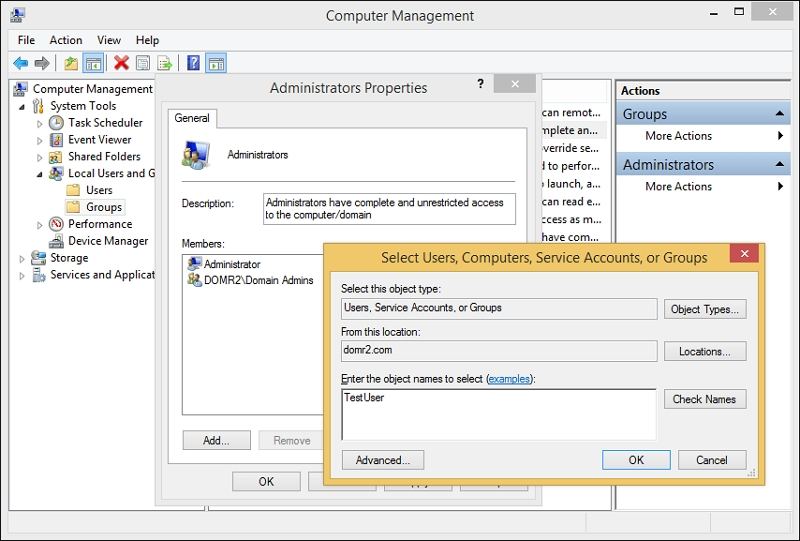
6. A dialog box will come up in the screen named as "Select Groups" to get more information about the account to be set up. do the following to set up an administrator account: In the "Enter the object names to select" type in the name of the account whether user or group which is needed to be added. Then click on "OK" to confirm.
If the user wants to add a computer account then he or she is advised to click on "Object Types". Tick the "Computers" box and again click on "OK" to save the changes. Now in the "Enter the object names to select" type in name of the computer account which is needed to be added. Then click on "OK" to confirm.
7. These steps will add the administrator account on the PC. However, this method is not applicable to each and every version of Windows like Windows 8 Home edition.
Part 2. Add a User to Local Administrator Group using Command Prompt
Another way to add up users as administrator in the PC is to add user to admin group cmd. Writing a few lines of command in the command prompt will let the user add more people to the PC. One more advantage of this method is that this method is applicable to every edition of Windows i.e. Windows 10/8/7/vista. To add user to local administrator group command line an elevated Command prompt is needed rather than the usual one
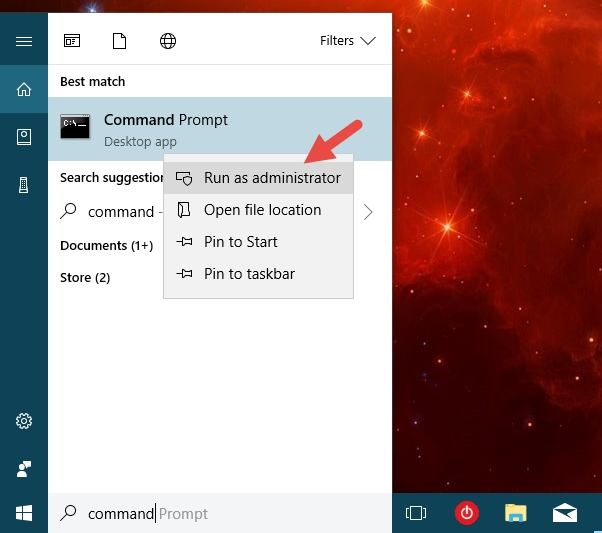
1. To open the elevated Command Prompt press "X" along with Windows key from the keyboard in case of Windows 10 and 8. In case of Windows 7 or vista go to "Start" and search for "command prompt" and make a right click on the same from the search result. Then select "Run as Administrator" from the drop down menu.
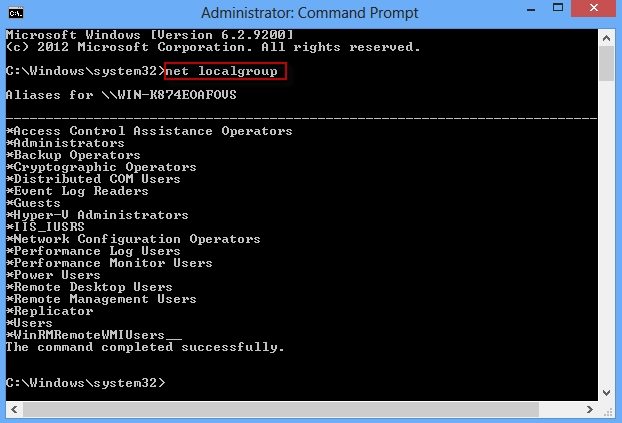
2. Now the elevated command prompt is launched. For discovering the names of the local groups type in the following command in the command prompt:
"net localgroup"
3. And press "Enter" from the keyboard
4. To add an administrator account to Administrator group use the following command:
"net localgroup Administrator [username] /add"
5. And press "Enter". Username will be the name of the account.
Part 3. How to Remove a User from Local Administrator Group
After knowing how to make a user an administrator windows 10 now to remove the undesired or unreasonable accounts from the administrator post is a thing to learn about. Process of removal of administrator account varies depending on the edition of Windows operating system and source region of the account folder.
Remove a User from Local Administrator Group in Local Users and Groups (Windows 10):
1. Local Users and Groups is only available in the Windows 10 Pro, Enterprise, and Education editions.
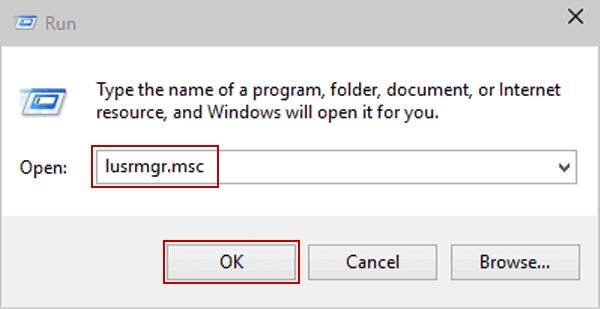
2. Press "R" from the keyboard along with the Windows key to launch "Run".
3. In the text field of "Run" type in "lusrmgr.msc" and click on "OK". This will open "Local Users and Groups".
4. If the account is in "Groups" under "Groups" folder in "Local Users and Groups, select "Groups" from the left side panel of the window. Click on the group name wished to remove uses as members of and select Properties" from the drop down menu. Select a user name and click on the "Remove" button and then click on "OK" to confirm the removal.
Remove a User from Local Administrator Group in Command Prompt (For All Windows):
1. Open an elevated command prompt to continue this process by following this steps.
2. Press "X" along with Windows key from the keyboard in case of Windows 10 and 8.
3. In case of Windows 7 or vista go to "Start" and search for "command prompt" and make a right click on the same from the search result. Then select "Run as Administrator" from the drop down menu.
4. Type in the below mentioned command in the command line and press "Enter" to run it:
5. "net localgroup "Group" "User" /delete"
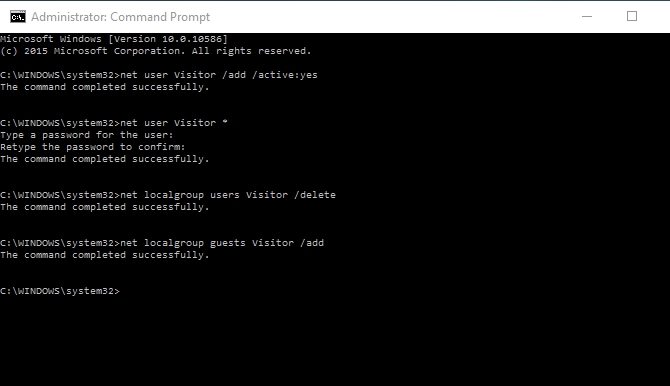
6. The "Group" and the "User" in this command should be replaced by the real name of the group and user to be removed respectively.
Additional Tip: How to Add a User to Remote Desktop User Group/ Debugger User Group/Power User Group
The best way to add a user to remote desktop is to use command prompt. Use an elevated command prompt and then type the commands as mentioned below to add the user in the desired groups.
Open the elevated Command Prompt by pressing "X" along with Windows key from the keyboard in case of Windows 10 and 8. In case of Windows 7 or vista go to "Start" and search for "command prompt" and make a right click on the same from the search result. Then select "Run as Administrator" from the drop down menu. Now the elevated command prompt is launched. Type the respective commands to add users to the respective groups:
1. To add in remote desktop users groups:
"net localgroup "Remote Desktop Users" UserLoginName /add"
2. To add in debugger users group:
"net localgroup "Debugger users" UserLoginName /add"
3. To add in power users group:
"net localgroup "Power users" UserLoginName /add"
Except for adding administrator accounts in the PC, there are other problems like forgetting the password which make people suffer a lot. But with the use of a simple tool named 4WinKey. This simple software can come in real handy for the problems related to lost password of WINDOWS 10 PC.
- Reset/Remove Windows admin and other user password for local/domain account.
- Create a new local/domain admin account to unlock your computer.
- Change your Microsoft account password offline.
- Fully support Windows 10/8.1/8/7/Vista/XP, Windows Server 2012 (R2)/2008 (R2)/2003 (R2).
- Related Articles
- 2 Ways to Change Account Type of Users in Windows 10
- Windows 10 Keeps Asking for Login User Password, How to Fix It
- Windows 10 Password is Incorrect, How to Fix it
