Tips on Changing Your Account Picture in Windows 10
Tips on Changing Your Account Picture in Windows 10
Want to change the uninteresting default account picture that randomly assigned by Windows 10? Actually, it’s pretty simple to change your Windows 10 account profile picture or photo. In this article, we will show you some tips on how to change your account picture, remove the old account picture in Window 10, let’s check it out!
Part 1: Change Account Picture for Windows 10/8 Account
Unlike previous versions of Windows, Windows 10 doesn’t include an option to change the account picture in Control Panel. Now, you have to change it from PC Settings. Here’s how:
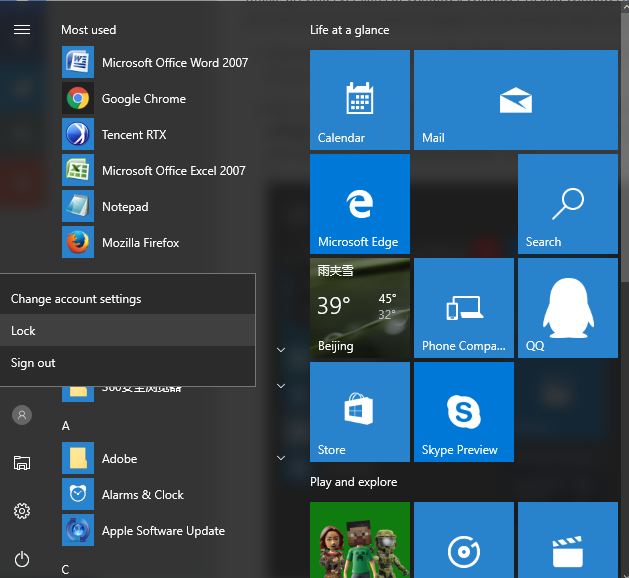
Step 1: Hit the Start button or press the Windows logo key on your keyboard to open the Start Menu.
Step 2: Right-click on the account picture at the top-left corner of the Start menu, and then select “Change account settings“.
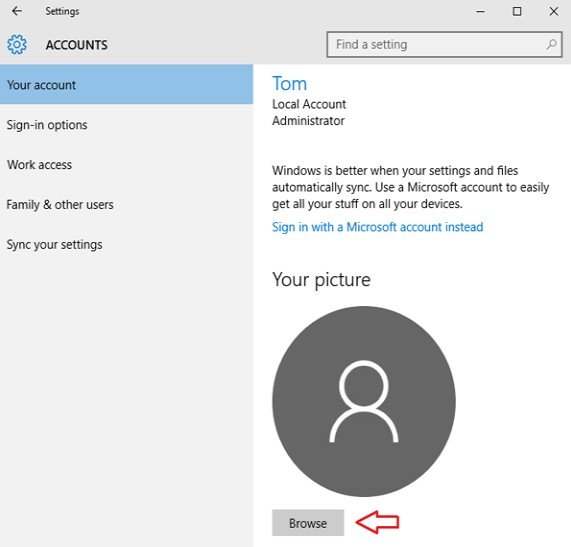
Step 3: Windows presents the PC Settings screen. Then you can see your current account picture. Just click on Browse button and select your favorite picture to set as new account picture.
Now your Microsoft Account picture is replaced by the new one.
Part 2: Remove Your Old Account Picture
If you changed your Windows user account picture from time to time, the previous account pictures will also be displayed on the right side of your current account picture. If you do not want to keep them anymore, you can follow the steps below to remove the old user account pictures:
Step 1: Open the File Explorer at the left bottom of your Windows 10 computer.
Step 2: Type the following path at the address bar, replacing username with the name of your Windows account.
C:\Users\username\AppData\Roaming\Microsoft\Windows\AccountPictures
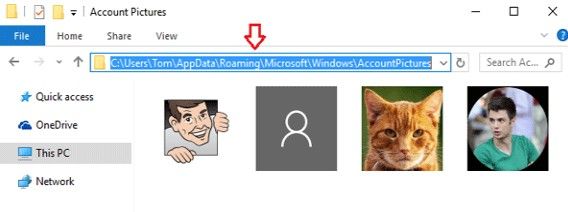
Step 3: Here you will get all those images what was ever used as your profile picture. Delete all the old images that you do not want to keep. That’s it! Your user picture cache is clean now.
Extra Tip: How to Recover Forgotten Windows 10 Password
If you have forgotten the login password when you try to change your account picture, then cannot get access to your computer. To get into your computer and change the account picture, you should recover or remove your Windows login password first with an easy-to-use password removed software-Windows Password Key. Here’s how.
Step 1: Download Windows Password Key and install this utility to your PC.
Inset a CD/DVD disk into the computer. Click "Burn" button to start burning an ISO image file to the CD/DVD.

Step 2: Insert the newly created CD/DVD to the locked computer and reboot the computer from the password recovery CD/DVD.
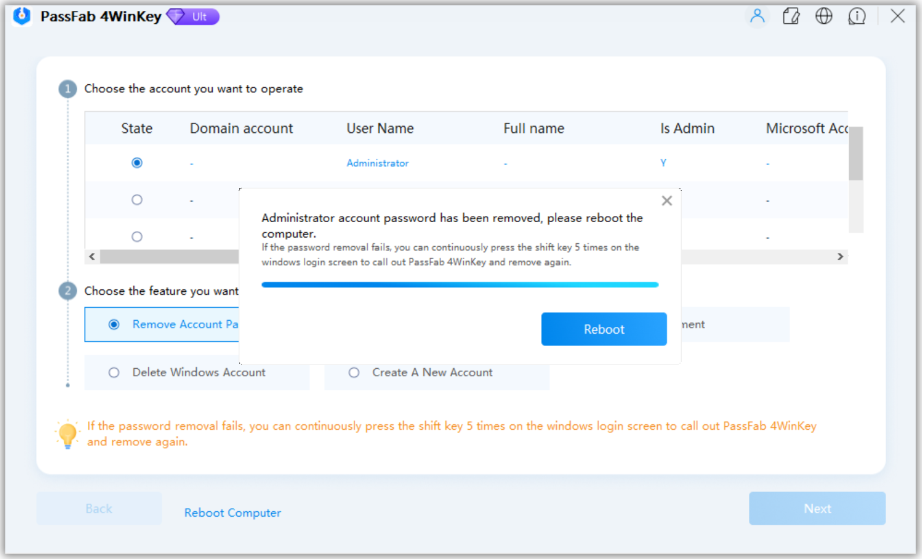
Step 3: Select the user account which you would like to remove the password, then hit "Remove Windows password" and click on “Next” to confirm
Step 4: Once you reset password successfully, click "Next" to close it. Then click "Reboot" to restart your computer and login Windows system without any password.
With all these tips shared above, you can easily and instantly change your account picture on Windows 10, do you know any other way on how to reset Windows 10 Microsoft account picture? Let us know in the comments!
- Related Articles
- Top 2 Ways to Show Windows 10 Hidden Files
- Top 3 Ways to Fix Boot Loop in Windows 10
- How to Boot Windows 10 from USB
