6 Ways to Open Snipping Tool in Windows 10
6 Methods to Launch the Snipping Tool on a Windows 10 PC
Snipping Tool Windows 10 is what allows you to capture screenshots on your Windows 10 PC. It makes it easier for you to take a picture of any screen and save it as an image file on your computer. With the tool installed on your PC, you don't have to install any other apps for your screenshot capturing needs.
In the following guide, you are going to learn how to open Snipping Tool using various methods. Not only one but there are several ways you can launch the tool and the following shows all of those methods to you.
- Method 1: Run Snipping Tool from Start Menu
- Method 2: Open Snipping Tool by searching
- Method 3: Turn Snipping Tool on via Run
- Method 4: Launch Snipping Tool via CMD
- Method 5: Create Snipping Tool Shortcut in Windows 10
- Method 6: Create a Hotkey for Opening Snipping Tool
- Extra Tip: Other Free Snipping Tool for Windows 10
Method 1: Run Snipping Tool from Start Menu
Start Menu is where almost all your apps are located and it is an effortless way to launch your favorite apps on your computer. Fortunately, Snipping Tool is available in the said menu and can be launched as shown below. This one's the easiest way to launch the tool on your Windows 10 PC.
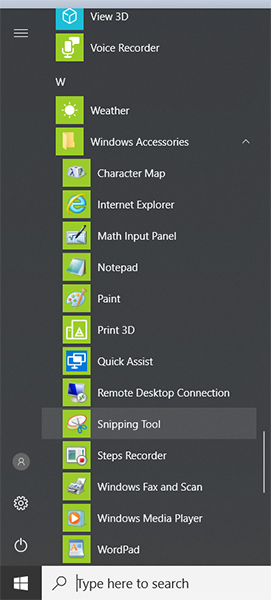
Press the Windows key on your keyboard and it will launch the Start Menu. From there, click on All apps followed by Windows Accessories and click on the app named Snipping Tool. The tool will launch and you're ready to start capturing screenshots on your PC.
Method 2: Open Snipping Tool by searching
Another way you can launch the Snipping Tool on your PC is to use the search function located next to the Start Menu on your machine. What you will need to do is search for the app and click on it when it appears, and it will launch. Here's how:
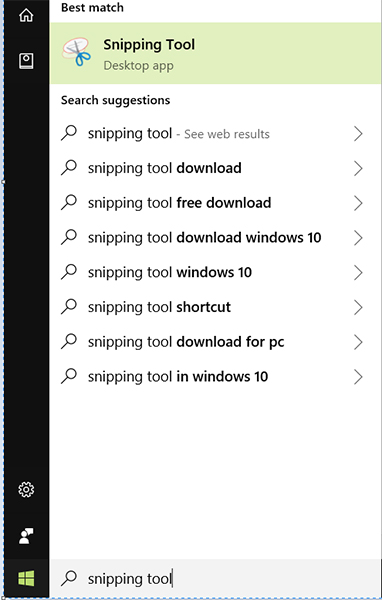
Click on the search box given next to the Start Menu and search for snipping tool. When the results appear, click on the one that says Snipping Tool and the tool will open on your PC. You may now start taking screenshots of whatever screen you want on your PC.
Method 3: Turn Snipping Tool on via Run
Run provides you with the ability to launch several apps including Snipping Tool on your PC. All you need to do is enter the name of the app you want to launch, and Run will open it for you. Here's how to open Snipping Tool using Run on your Windows 10 computer.
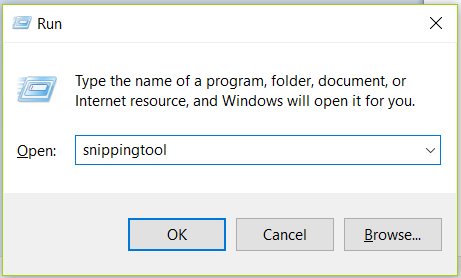
Open the Run dialog box by pressing Windows + R keyboard shortcut. When the box opens, type snippingtool into it and press the Enter key. The tool will launch on your screen for you.
Method 4: Launch Snipping Tool via CMD
Just like the Run dialog box, Command Prompt also provides you with the ability to open apps as well as execute commands on your computer. Launching the Snipping Tool from a command prompt window is extremely easy and the following shows how to do it.
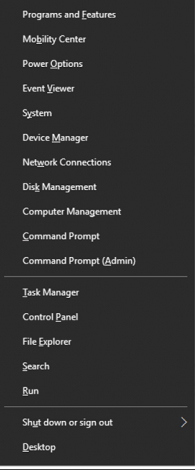
Step 1: Press the Windows + X keys on your keyboard and a menu will appear. Choose Command Prompt (Admin) from the menu to open a command prompt window.
Step 2: When a command prompt window opens, type in snippingtool.exe and hit Enter.
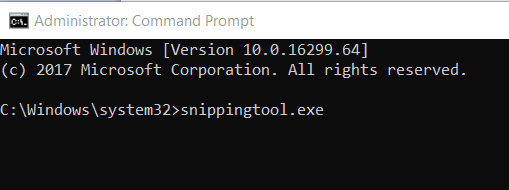
The typed command will get executed and the tool will launch and be in front of you on your screen.
Method 5: Create Snipping Tool Shortcut in Windows 10
If you think you will be using the tool too frequently, it's advised that you create a shortcut for the app on your desktop. That way you will be able to launch the app by double-clicking on the app shortcut on your desktop. The following shows how to create a Snipping Tool shortcut Windows 10:
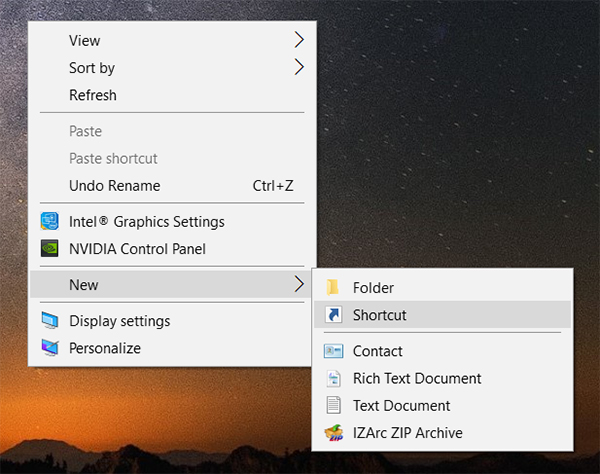
Step 1: Right-click on an empty area on your desktop and select New followed by Shortcut to create a new shortcut.
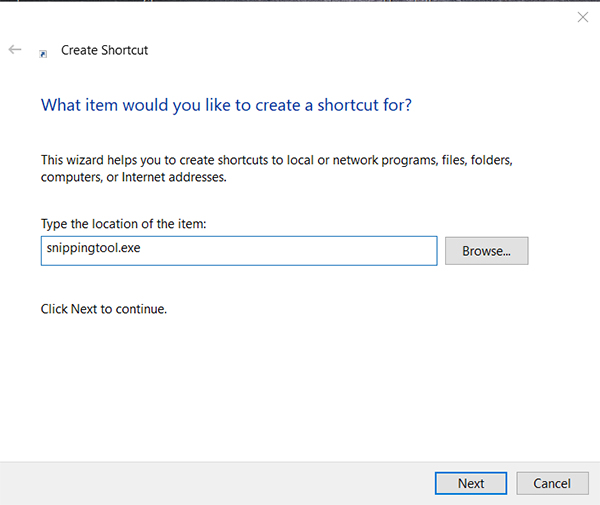
Step 2: You will be asked to enter the location of the item you want to create a shortcut for. Type in snippingtool.exe and hit the Next button to continue.
Step 3: It will ask you to enter a name for the shortcut. You can enter any name of your choice. Once done, click on Finish to save the changes.
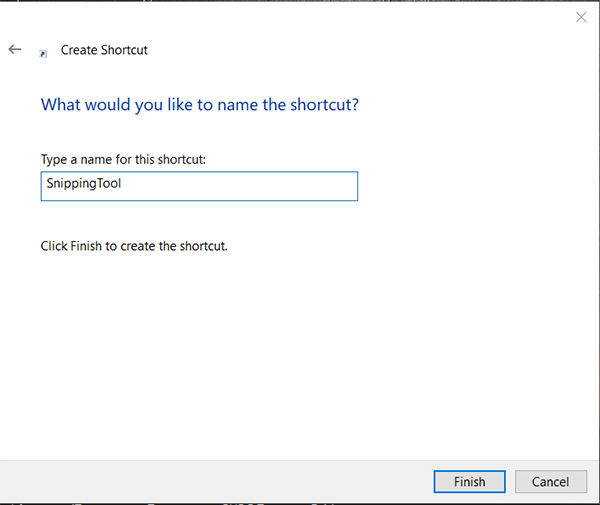
A new shortcut will be placed on your desktop with your chosen name. Double-click on the shortcut and it will open the Snipping Tool for you on your PC.
Method 6: Create a Hotkey for Opening Snipping Tool
If a keyboard shortcut is your way of launching apps, you won't be disappointed. There is a way you can set up a hotkey for launching the Snipping Tool on your computer. The following steps will help you create a hotkey for then tool:
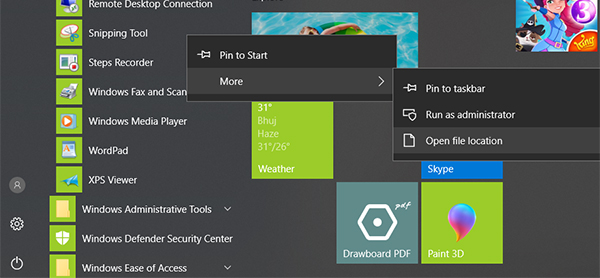
Step 1: Open the Start Menu and head to All apps > Windows Accessories, right-click on Snipping Tool and choose More followed by Open file location.
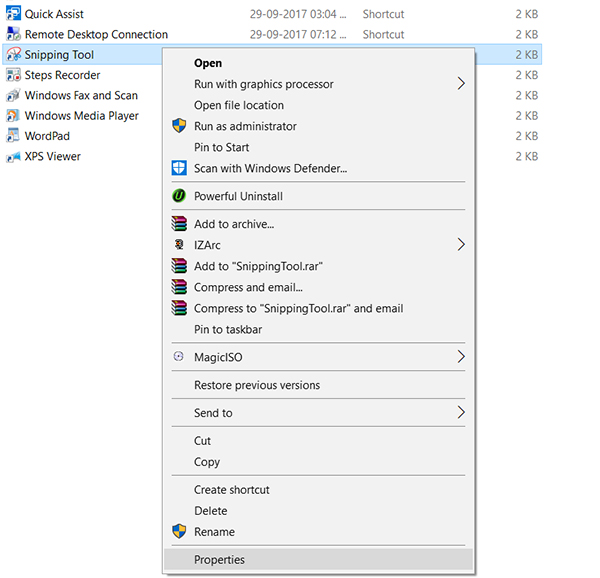
Step 2: On the following screen, right-click on Snipping Tool and select Properties.
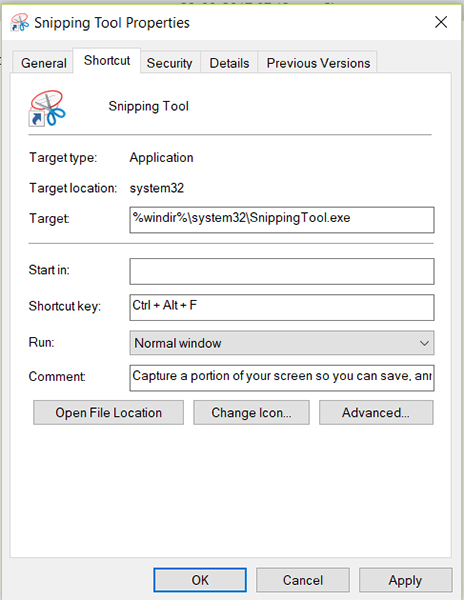
Step 3: Open the Shortcut tab and click on the field next to Shortcut key. Press the keys you want to set as hotkey for the tool and click on OK to save the changes.
From now on, whenever you press the hotkey, it will launch the Snipping Tool on your computer.
Extra Tip: Other Free Snipping Tool for Windows 10
If you are not happy with the built-in tool and would like other Snipping Tool download Windows 10, then here are five of the free snipping tools available for your Windows 10 PC.
1. Greenshot
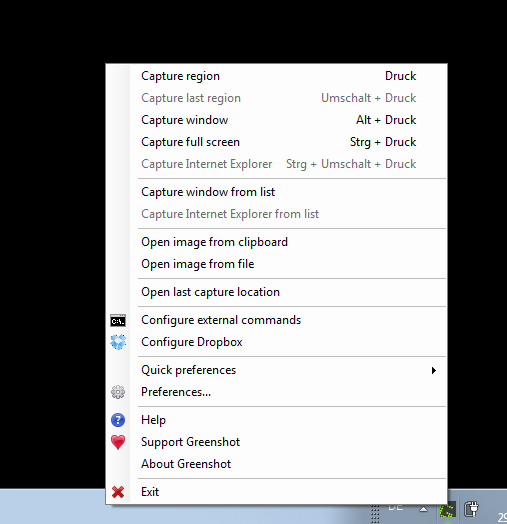
Greenshot is available for both Mac and Windows and it provides you with a straightforward way to capture screenshots. It supports OCR and allows you to annotate the screenshots you have captured on your computer.
2. ShareX
ShareX is a nice screen capturing tool that is open source and comes with tons of features to use on your PC. It lets you take screenshots of individual focus areas, is lightweight, and has customizable workflows.
3. Lightshot

Lightshow will sound familiar to you if you have ever searched for screen capturing tools on any search engine. It's the fastest way to capture screenshots and share them on the Internet. You can also edit screenshots right after you have taken them on your PC.
4. Lightscreen
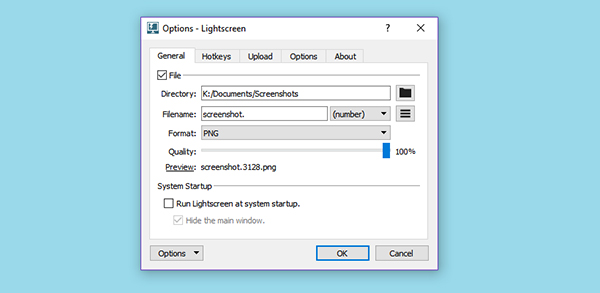
Lightscreen allows you to set up a hotkey to take screenshots and the app runs in the background so as not to disturb you while you work on your tasks. You can set the preferences as to how you would like to save the screenshots in the app.
5. Screenshot

Screenshot is more than a screen capturing utility as it lets you edit and even upload your screenshots to the Internet right from the app. You've got flexible screenshot modes as well as you can configure the app to take scheduled screenshots for you.
There are so many interesting things that you can learn about Windows 10. If you don't already know, you can now even recover password for your user account on your PC. That way you can get access to your account even when you have forgotten the password. What makes it possible is a software called Windows Password Key that can be obtained from its official website.
We are sure you will like at least one method out of the all the methods given above to launch the Snipping Tool on your computer. Learning how to use Snipping Tool Windows 10 is beyond the scope of this guide but it's easy when you launch the app on your PC.
- Reset/Remove Windows admin and other user password for local/domain account.
- Create a new local/domain admin account to unlock your computer.
- Change your Microsoft account password offline.
- Fully support Windows 10/8.1/8/7/Vista/XP, Windows Server 2012 (R2)/2008 (R2)/2003 (R2).
- Related Articles
- How to Create Windows 10 Password Reset USB/CD with ISO
- 3 Best Ophcrack Alternatives for Windows 10
- How to Fix "Windows 10 Domain Username or Password is Incorrect" Error
