How to Find or Change Homegroup Password on Windows 10
How to Find or Change Homegroup Password on Windows 10
One of the file sharing concepts that Windows PCs come preloaded with is HomeGroup. A HomeGroup is basically a group of computers connected to a single local network. Once you have established a group, you can easily share files between your network computers and even stream media files. In order to add a new PC to the group, you are going to need the HomeGroup password.
A HomeGroup password keeps your group secure by allowing entry to only those computers that have the password for the group. If you created a HomeGroup a long ago on one of your machines and you cannot recall the password for it, then this guide will help you to find Windows 10 HomeGroup password.
It is easy to find the password and the following is how you do it on your Windows 10 based machine.
- Part 1. How to Find or Recover Homegroup Password on Windows 10
- Part 2. How to Change Homegroup Password on Windows 10
- Extra Tip: How to Recover Login Password on Windows 10?
Part 1. How to Find or Recover Homegroup Password on Windows 10
In order to find HomeGroup password on your Windows 10 PC, you will need to follow a few steps. Once you have completed these steps, your password will be displayed on your screen. You can then copy it or use it on another machine to add it to your current HomeGroup.
Step 1. Open the File Explorer utility on your computer by launching any of the folders on your machine. When it opens, you will find a HomeGroup entry in the left sidebar. Right-click on the entry and select the option that says View the HomeGroup password.

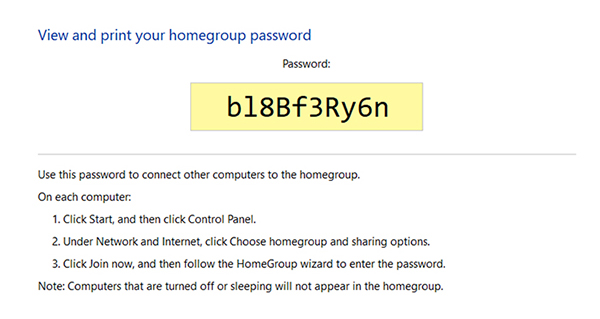
Step 2. The following screen will display the HomeGroup password on your screen. You may copy the password or physically note it down for later use on other machines. You can even print it for your records.
So that was how to find HomeGroup password using an easy to follow method on your Windows 10 based computer.
Part 2. How to Change Homegroup Password on Windows 10
If someone has found out your HomeGroup password and you would like to change the password, it is easy to do that as the HomeGroup feature already comes with the change password option.
Using the option, you can enter in a new password to be used with your current HomeGroup establishment and the following shows how you can go about doing it on your Windows 10 machine.
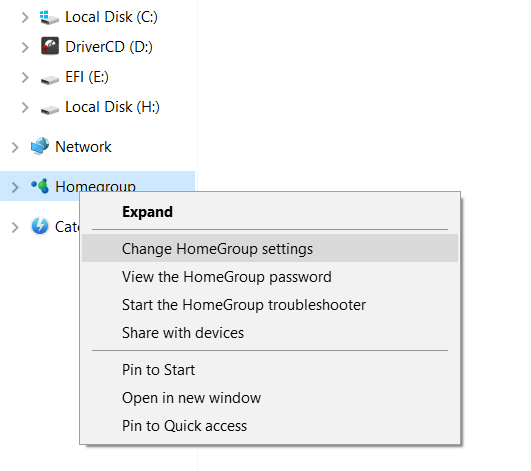
Step 1. Open the File Explorer utility on your computer. Look for the HomeGroup option in the left sidebar and right-click on it and select the option that says Change HomeGroup settings. It will let you change your HomeGroup settings including your password.
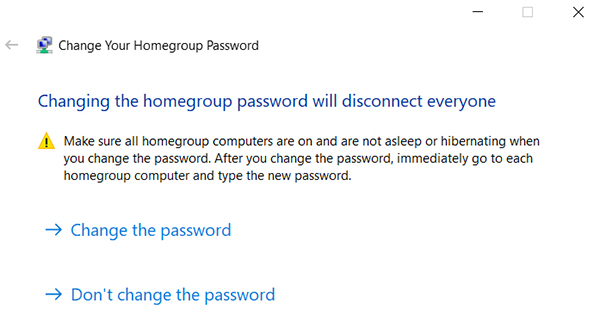
Step 2. The screen that follows will have an option saying Change the password. Click on the option to specify a new password for your HomeGroup.
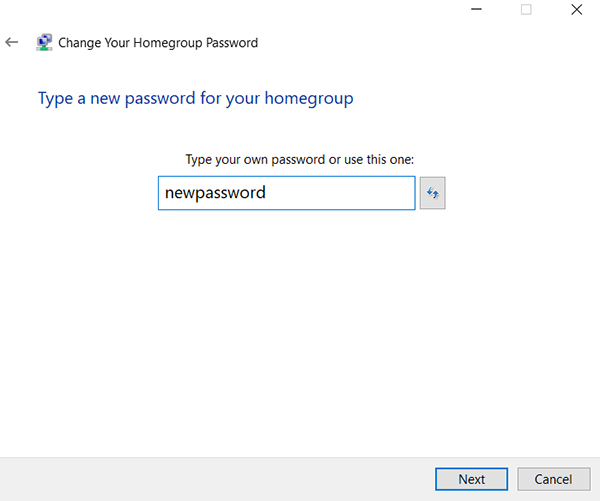
Step 3. On the following screen, you should be able to set a new password for your HomeGroup. Your OS will provide you with some password suggestions and you can create your own as well. Click on the Next option when you have specified your new password.
You are all set. Your HomeGroup password should be changed and this new password is what you will need to use in future to add new PCs to your network.
Extra Tip: How to Recover Login Password on Windows 10?
In order to make any changes to your HomeGroup, you will first need to log-in to a user account on your computer. If you have forgotten the password of your user account and you are unable to log-in to your account, you will need to recover the password.
There is a nice little software called Windows Password Key that allows you to reset and change passwords of user accounts without requiring you to log-in to your machine. It even lets you remove and add new accounts to your system without even booting-up your machine.
The following shows how you can use the software to reset your login password in Windows 10:
Step 1. First of all, download the software to any computer you can access. And run it on your computer. Insert a blank CD/DVD/USB flash drive into your computer, select it in the software, and click on the button that says Burn.

Step 3. Boot your locked PC from the bootable media drive you just created.
Step 4. On the following screen, you will see all the user accounts that exist on your system. Select your user account from the list, choose the Remove Windows Password option, and click on the Next button
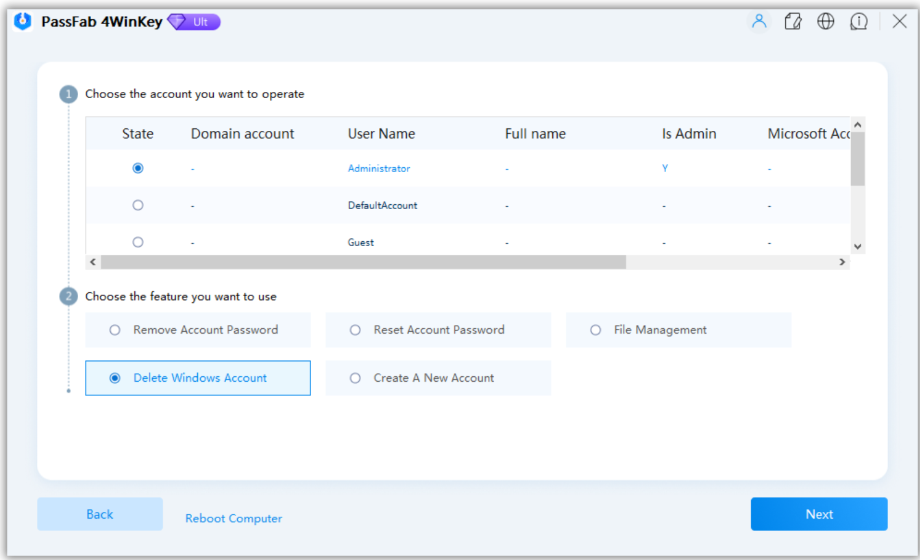
That's all. The password from your user account should be removed and you will be able to log-in to your account without the need to enter a password.
Conclusion
If you ever need to view or change the HomeGroup password Windows 10, the above guide has the easiest ways to do your tasks. We hope it helps you retrieve your password and gives you the ability to change it on your computer.
- Reset/Remove Windows admin and other user password for local/domain account.
- Create a new local/domain admin account to unlock your computer.
- Change your Microsoft account password offline.
- Fully support Windows 10/8.1/8/7/Vista/XP, Windows Server 2012 (R2)/2008 (R2)/2003 (R2).
- Related Articles
- How to Create Windows 10 Password Reset USB/CD with ISO
- 3 Best Ophcrack Alternatives for Windows 10
- How to Fix "Windows 10 Domain Username or Password is Incorrect" Error
